
Alright, listen up Kemosabe — whether you’re building a 100% AI-based OFM operation, OR an AI-powered Hybrid OFM agency, you need to master one critical skill that can make the difference between having gold nuggets randomly popping out of your ass, and hunting expired packs of ramen for your next meal.
We’re talking about character consistency — creating AI character content that looks the same across every image, every angle, every emotion, every post.
That kind of consistency builds a brand. It builds recognition. It makes fans start to feel like they know her — and that’s when the real money starts flowing.
It doesn’t matter whether your influencer is 100% AI, or whether your AI content is based on a human model — if the content ain’t consistent, your social media accounts will suck the hairiest donkey balls ever discovered on planet Earth.
And you know what? You don’t need a Hollywood CGI studio to nail this down. You just need Nano Banana, a free photo editor like PhotoPea, and Seedream to create your content.
Let’s break this whole process down, step-by-step, shall we?
Step 1: Start With a Solid Character Identity
Before you generate even one image, you’ve gotta know who your AI model is. If you’ve got a human model, great, you can skip this step.
Ask yourself:
-
What’s her vibe?
-
What’s her audience?
-
What kind of content is she going to make?
Is she a soft-spoken gamer girl who lives on Twitch and posts cozy selfies? A sultry fantasy witch who reads tarot and drops moonlit thirst traps? Or maybe she’s a cheeky e-girl who flirts with everyone like it’s her job (because, well, it is).
If you need inspiration, go to a site like Pinterest and type in the kind of person you’d like your character to be. Find an image, download it, then use it as a reference for the sheet you will build below.
Write out a simple character reference sheet — I’m talking basic but crucial details — or upload the Pinterest image to ChatGPT and ask it to create a character sheet based on it.
-
Name
-
Age range and look
-
Hair color/style
-
Clothing styles
-
Facial expressions you want her to have
-
Common poses or props
This sheet becomes your blueprint. You’ll use it to guide every prompt, every collage, every training step.
The clearer you are here, the cleaner your end result will be.
Pro Tip: Sit down with ChatGPT and explain exactly the kind of character you want to create, and that you need a character reference sheet for it. It will give you a hyper-detailed sheet you can use for the next step.
Step 2: Create a Character Collage
Now we move to Nano Banana — one of the best AI image generators for consistent character creation. It’s available inside the Google AI Studio for the low, low price of FREE. But just letting you know here that the Pro version is much better. You can get access to it by signing up for suite tools like HiggsField AI and WaveSpeed AI.
The idea is simple: instead of generating random one-off images, you’re going to build a collage — a single image that shows your character from multiple angles, in different moods and expressions. It’s like a grid of several different shots of the character in one image.
Hybrid Note: If you’ve got a human model, you don’t have to create a collage, but you will want to have her take several images of herself in good lighting. The images should show her wearing different facial expressions, and show her from different angles. She should be wearing a tight-fitting top and bottom.
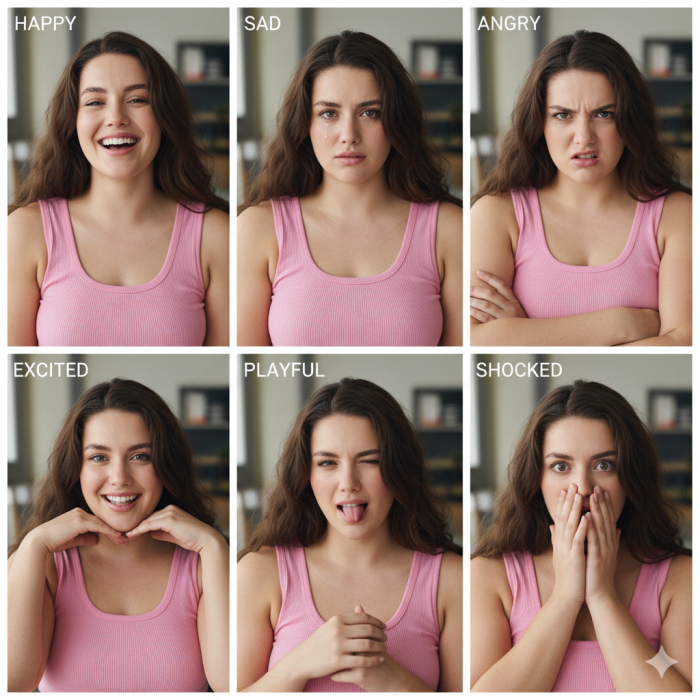
Think of it like a “character study” — the same person smiling, turning, laughing, pouting. You will also want a collage that includes a side view or two, from different angles.
Prompt Tips for Nano Banana
Try to create 6 portraits in one image. You can even use the “collage” or “grid” keyword in your prompt to help AI compose it neatly.
- “Create a collage sheet of 6 different facial expressions of this character in a 3:2 aspect ratio.“
Add instructions to the prompt:
-
“Front view, profile, ¾ angle, looking up, smiling, serious expression, angry frown”
-
“Uniform lighting, photo collage layout”
Repeat this process as many times as you need to in order to get a significant set of images. You should get some body poses in a collage, as well (facing front, from the back, from the side, etc).
Once you’ve got solid collages — your girl looks like herself in every panel — download them in the highest quality possible. Image quality is VERY important throughout this entire process.
Step 3: Split That Collage into Individual Images
Now it’s time to chop it up, unless you’re Hybrid OFM, in which case you can move on to Step 4.
Open your collage in PhotoPea (free & web-based, it’s basically Photoshop in your browser) or real Photoshop if you’ve got it.
Use the rectangular selection tool to crop out each panel separately.
Each one should show your character from a slightly different angle or with a different expression.
Save each cropped section as its own file — ideally PNG or high-quality JPG — and label them like:
-
model_front_smile.png
-
model_side_serious.png
-
model_laughing_angle.png
You’re aiming for a balanced reference set — a mix of close-ups, side views, and one or two full-body or mid-shot images.
The individual files you create from the collages are what you’ll feed into SeeDream in the next step.
Step 4: Create Your Content In Seedream
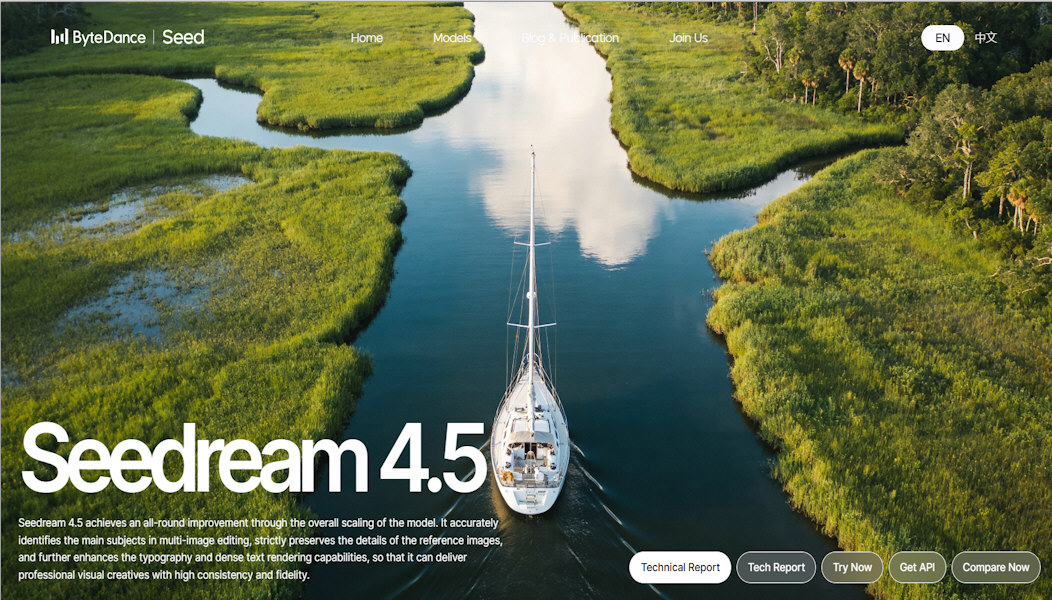
Here’s where the magic happens. For this step, you will need access to Seedream, which is available on HiggsField AI or WaveSpeed AI. You will want to be using version 4.5 at minimum.
Seedream is the AI tool that lets you create consistent image content from base reference images — it’s incredibly powerful and a total game-changer.
Hybrid OFM Guys Take Note: Use your human model’s base images to create a character reference sheet for him/her (you can feed the reference images to ChatGPT and ask it to spit out a sheet). You will be using those images and sheet info for your image generations in Seedream.
How To Prompt Seedream
SeeDream is powerful — but it rewards precision. Small wording changes can create big visual differences. The goal here is to reduce randomness and increase repeatability.
Let’s break this down into a practical framework you can follow every time.
Tip 1. Start With Your Character Reference Sheet
Before describing poses, outfits, or settings, you want a fixed character identity section in your prompt that never changes. The character reference sheet discussed above accomplishes this — copy and paste it into every prompt.
Your character sheet should include:
-
Age
-
Ethnicity
-
Hair color and style
-
Eye color
-
Skin tone
-
Body type
-
Distinguishing traits
-
Face structure descriptors
Example:
22-year-old Caucasian woman, light brunette hair, shoulder-length soft waves, emerald green eyes, lightly sun-kissed skin, slim athletic build, heart-shaped face, soft cheekbones, small nose, natural lips, subtle feminine features
Keep this block consistent across all generations.
Do not:
-
Randomly swap “slim” for “petite”
-
Change “sun-kissed” to “porcelain”
-
Alter facial structure wording
Even minor changes can shift facial geometry.
Think of this character reference sheet as your AI model’s DNA.
Tip 2. Use “Face Preservation Language”
After you’ve got your character sheet in the prompt, upload one or more of your model’s reference images into the prompt box. Seedream is very good at preserving details from a reference image, so if you’re generating an image of your model smiling while listening to music, upload the base image that shows her smiling.
Add lines like:
-
“maintain identical facial features to reference image”
-
“same woman as reference photo”
-
“preserve facial structure and eye shape”
Seedream responds well to clarity. Don’t assume it understands what you want — state it directly.
Tip 3. Control the Camera to Avoid Face Drift
Camera descriptions matter more than beginners realize.
If your base image is:
-
Eye-level
-
50mm lens
-
Soft natural lighting
And you suddenly prompt:
-
Wide angle lens
-
Extreme low angle
-
Dramatic overhead shot
You’ll often distort the face and lose consistency.
To stay safe, use neutral camera descriptors like:
-
“shot at eye level”
-
“natural perspective”
-
“50mm lens”
-
“photorealistic portrait photography”
Only change camera angles intentionally.
Tip 4. How to Change the Setting (Without Changing the Girl)
This is where most beginners accidentally create a new person.
When changing the environment, keep the character block 100% identical and only modify the setting section.
Structure your prompt like this:
[Character Reference Sheet]
+
[Outfit Description]
+
[Pose Description]
+
[Environment Description]
+
[Lighting Description]
Example 1: Bedroom Scene
22-year-old Caucasian woman, light brunette shoulder-length soft waves, emerald green eyes, lightly sun-kissed skin, slim athletic build, heart-shaped face, soft cheekbones, small nose, natural lips, same woman as reference image, preserve facial structure.
Wearing a soft white oversized sweater.
Sitting casually on a bed, relaxed pose.
Modern bedroom setting with neutral tones, soft bedding.
Natural window light, soft shadows, realistic daylight.
Example 2: Beach Scene (Same Girl)
Only change the environment + lighting:
22-year-old Caucasian woman, light brunette shoulder-length soft waves, emerald green eyes, lightly sun-kissed skin, slim athletic build, heart-shaped face, soft cheekbones, small nose, natural lips, same woman as reference image, preserve facial structure.
Wearing a light summer sundress.
Standing casually with relaxed posture.
Sunny beach environment with ocean in background.
Harsh midday sunlight, realistic outdoor shadows, natural skin highlights.
Notice:
The identity description is untouched.
That’s the key.
Tip 5. Changing Clothing Without Changing Identity
Clothing can influence body perception and accidentally shift proportions.
To avoid drift:
-
Keep body descriptors consistent
-
Reaffirm “slim athletic build” or whatever your base is
-
Avoid vague clothing like “stylish outfit” — be specific
Instead of:
trendy outfit
Use:
fitted black crop top and high-waisted denim shorts
Specific clothing = more control.
If you want variety without distortion:
Add:
-
“clothing fits naturally”
-
“accurate body proportions”
-
“realistic fabric draping”
Tip 6. Use Lighting to Match the Setting
Lighting mismatch is one of the biggest realism killers.
If she’s at the beach, don’t use:
-
“studio lighting”
-
“softbox lighting”
-
“cinematic rim light”
Instead use:
-
“natural outdoor sunlight”
-
“realistic harsh daylight shadows”
-
“sunlight from above”
If indoors:
-
“window light from left side”
-
“warm ambient room lighting”
-
“soft indoor shadows”
Lighting consistency improves identity stability more than people realize.
Tip 7. Avoid Overloading the Prompt
Seedream is powerful, but long chaotic prompts create instability.
Keep prompts:
-
Structured
-
Clear
-
Direct
-
Logically ordered
If something keeps drifting, simplify.
Sometimes removing extra adjectives improves consistency dramatically.
Tip 8. Use Negative Prompts Strategically
If SeeDream starts drifting:
Add negative instructions like:
-
“no facial distortion”
-
“no exaggerated features”
-
“no anime style”
-
“no stylization”
-
“avoid over-sharpening”
-
“avoid plastic skin”
- “do not age the person”
This helps maintain realism.
Tip 9. Regeneration Strategy for Perfect Consistency
When you get a perfect image:
-
Save the prompt and reuse.
-
Save the image and use it as a reference image for future generations.
Over time, you’ll build a library of “proven stable prompts” that generate consistently.
Tip 10. Golden Rule: Change One Variable at a Time
If something goes wrong and you changed:
-
Outfit
-
Pose
-
Lighting
-
Camera angle
-
Setting
You won’t know what caused the issue.
Instead:
Change only ONE category per generation.
That’s how you debug your workflow like a pro.
Simple Prompt Formula You Can Reuse
Here’s a clean template beginners can copy:
[Fixed Character Reference Sheet – do not change]
Wearing [specific clothing description].
[Clear pose description].
[Environment description].
[Lighting description].
Photorealistic, natural proportions, maintain identical facial features to reference image, no distortion.
Final Advice
Character consistency is not magic.
It’s discipline.
If you:
-
Lock your character reference sheet
-
Keep camera consistent
-
Change settings cleanly
-
Control lighting
-
Avoid randomness
You can generate unlimited content that looks like the same person in different scenarios.
And once you master this?
You don’t need complicated workflows.
Just clean prompting.
Ok, stay tuned to my emails for more on all this shit. If you’re not on my list, you can fix that here.